Related Posts with Thumbnails

Thursday, December 30, 2010

Happy 2011!


Happy New Year

I wish you the very best for 2011! May all your dreams come true!

What are your plans for 2011?

I plan to really get creative in 2011!Rolling on the floor laughing I want to be more active on my blog, making it more interesting with lots of free stuff Winking smileand ideas.

I want to sew again! Thumbs upI plan on painting my Red heartout for our exhibition this year – we have an awesome theme for this year {more about that another time}.

I want to get my kids motivated for school {well, at least try!}; I want to redecorate our bedroomIn love; the kids’ playrooms; GirlShannon’s bedroom & the formal lounge. I also would love to renovate and refurnish our holiday home in the bushveldSun. I’m going to plan our next holiday…Island with a palm tree


CLICK HERE for some printable Happy New Year clocks – 1 large one and 6 small ones. Use them for cupcake toppers, to embellish banners, as a Happy New Year wreath or anything you else your creative mind can come up with. – Enjoy!

{If you have any trouble with the download, please let me know so that I can repair the problem – Thank you}

Have a fabulous New Year!Party smile

signature

Wednesday, December 29, 2010

Season’s Greetings

Just a quick “Hi” from me! ‘Tis the season for craziness and lots of fun and family time, so I’ve not been around at my blog much of late. I thought I’d share a quick collage of Christmas 2010 in our house.

christmas 2010_web

Hope you have all had a fabulous holiday season! We certainly have - and after all the tinsel, wrapping paper, food and fun, I can honestly say I’m ready for the New Year. Today I went and bought some plastic containers to pack away some old toys (which we want to keep), and I plan on sorting through my kids rooms… yip it’s my New Year “Spring Clean” time! So I’m off to do some sorting and storing…

Chat soon,

signature

Sunday, December 5, 2010

Cookie Mix Gift Jar and free printable labels

Hi there!

I have had internet problems of late- I ran out of bandwidth just before month-end and decided that buying another gig would be wasted as it would not be used by the end of the month – so hence no postings for a while from me!

I also have been running around buying new school clothes for next year as my kids are both changing schools. On top of that it’s been the end of the school year, so it’s been a run-around as well as shopping up a storm for shorts, t-shirts and swimming costumes as we’re off on a seaside holiday (more about that later).

Anyway…. I saw this gorgeous idea over at Skip to my Lou a while back and decided I simply had to make it.

Cookie Mix Gift Jar

Here’s my version of it. I used my own recipe which a friend of mine gave me around two years ago. These biscuits are yummy- very much like shortbread. The big “plus” is that they are so easy to make!

The jar all decorated and filled with the dry ingredients for the cookies:

022

A close-up of the instructions hanging from the jar:

026

I  crocheted flower for decoration:

037

034

The top of the jar…

019

035

You will need :

  • Dry Ingredients (see the recipe below)
  • 2 Ribbons for tying around the jar (I used 2 different ones- one for around the ‘tummy’ of the jar, the other for around the lid.
  • A length of jute or string to tie the instructions label onto the jar.
  • hole punch
  • Glue gun (for gluing on the flower embellishment).
  • Modge Podge – for gluing on the labels.
  • Sponge brush applicator for the modge podge.

image

The Recipe:

Place the following ingredients in a 1 litre jar:

(In South Africa- you can buy a 1 litre Consol jar at pick n Pay)

  • 2 cups cake flour
  • 1/2 cup corn flour
  • 165ml icing sugar
  • 1/2  teaspoon salt

Close the lid.

  • Now print out these printable labels onto an A4 sheet of lightweight cardstock (for 2 jars).

(click on image to enlarge)

Cookie Jar

* You can also access the printable sheet via my Google Docs account HERE

  • Cut out the labels. I used a 2 1/2 inch round punch (Fiskars) for the round labels.
  • Use the sponge brush applicator to apply a thin layer of modge podge to the “Santa’s Cooki Mix” circle label and apply to the lid of the jar.
  • Measure ribbon for around the ‘tummy’ of the jar. I applied a little modge podge to the ends and adhered it to the jar to keep the ribbon in place before applying the front label. (The ends are hidden under the bracket label).
  • Apply modge podge to the bracket label “A jar full of Christmas” and adhere to the front of the jar over the ribbon.
  • Tie another length of ribbon around the jar lid.
  • Punch a hole in the top of the instructions label and tie it to the jar with jute or string.
  • Add a crochet flower, silk flower or any other embellishment you like using a hot glue gun.

I have halved the original recipe to be able to fit all the ingredients into the 1 litre jar. Here is the original recipe which is for a larger batch of cookies if you want to make some for yourself:

  • 4 cups cake flour
  • 1 cup corn flour
  • 1 1/3 cup icing sugar
  • 1 teaspoon salt
  • Mix all dry ingredients together.
  • Add 500g butter and 2 teaspoons vanilla essence
  • combine well.
  • Roll into a sausage shape, cover with cling film. Refrigerate for 15min-1/2 hour.
  • Remove from fridge and slice into 5mm slices. (If too thin, they break easily).
  • Bake at 180°c for 15 minutes

These make great hostess gifts, teacher gifts – or simply a little Christmas gift for friends and neighbours.

I will be away on holiday for the next week. We’re flying to the Seychelles tonight (at 23h55!!) for a week of summer sun, crystal clear turquoise sea and beautiful white beaches. It’s a 5 hour flight so tomorrow morning we arrive in Seychelles at 6am (local time- they are an hour ahead of South Africa). We’ve got our snorkelling gear and sunblock all packed and ready to go, so you won’t be hearing from me for a while.


image


 image

image

image

Linking to :

image

Chat soon,

signature

Wednesday, November 24, 2010

Today’s Tutorial : Crazy colourful crochet circles

Here’s a sneak peek of a project I’m busy with at the moment. In fact every moment when I sit still, I keep my hands busy with this.

I am crocheting loads of these colourful circles which will ultimately be sewn onto a long cushion for my daughter’s bed.

Now by “long”, I mean long- think the width of a Queen-size bed and then the height of a standard pillow.

I got the idea when we saw one in a shop recently, but it was simply too expensive - especially since I could make it! I’ll be making the cushion up in a lovely natural fabric- almost the colour of burlap (hessian) – perhaps a little lighter. I think it will look gorgeous with all those colours.

I’m almost done with all the crochet circles, and just as soon as I’ve finished straightening out my pigsty studio and found got out my sewing machine, then I’ll whip up the cushion. My daughter is hoping it’s before she changes her mind again on her decor scheme! - Remember the “orange” decor ?– well that’s evolving (thankfully) into a more pleasing  natural look finished off with these crocheted circles. Note- there is still splashes of orange in the circles –LOL!

After many a trial and error, I have finally figured out how to make these circles – (You’ll see some of mine aren’t ‘perfect’ – those are my trial and error ones which were kept anyway!! LOL). believe me, after you’ve made this many, you eventually figure it out!

If you would like to make these – here’s a tutorial how to crochet them :

(My first tutorial on crochet – so please forgive me if it’s not very clear- please ask questions if you need to! Winking smile

Red heartIf you click on any of the highlighted words, you’ll be redirected to a tutorial on how to do that particular stitch.

NOTE: In South Africa and the UK, we use the term Double Crochet instead of Single Crochet (US term). For the purpose of this tutorial, I’m going to refer to DC as SC – it’s easier as the tutorial I have found for you on the stitches refer to DC as SC. {hope that makes sense!}

I used a 4mm hook with Double knit yarn. (I think it was double knit- I’m no expert!-it’s just plain old ordinary wool – the thicker your yarn, the bigger your project will turn out.)

  1. Crochet 6 chains.
  2. Join into the first chain with a slipstitch to form a circle. Light bulbChain 1.
  3. Crochet using SC into the ring as many times as you can. (Probably around 6-8). Join the circle with a slip stitch.
  4. Chain 1.
  5. Crochet into each chain twice using single crochet (This is how you increase stitches).
  6. Join the circle again with a slipstitch into the first SC.
  7. Add a new colour in. Chain 1.
  8. Continue the next round with SC, but SC twice into every second chain. (First Row)This will ensure that your circle lies flat and does not curl up. Sun
  9. The next round, only increase into every 3rd stitch.
  10. The round after that, increase into every 4th stitch –and so forth.
  11. keep going until the circle is the size you would like. I have varied the sizes of my circles slightly and for further variation, here and there I’ve thrown in a row of DC (Treble – UK and RSA).

SunRemember : Join circle at the end of each round with a slipstitch and start each new round by chaining 1.

** NOTE : If there are too few or too many increases in a round, your circle will not lie flat. If it curls in, you have too few increases, if it buckles and gets wavy, you have too many increases.

Light bulbThere’s a really simple way to make an adjustable magic circle to start with – the circle is so much easier to control, especially in other projects when you need to add lots of stitches into a tiny centre circle. Watch the following video to see how:

FilmstripHere is a video I just found (after writing this entire tutorial –LOL) which explains really well how to make a “magic circle” and how to do the slipstitch at the end of each round to join the circle. It also explains exactly how and where to increase each round. Easy Peasy! Go take a look – you will be able to learn exactly how to do this without having to read instructions!

What I love best about these circles is just when I start getting bored with my circle, it’s time to end it off and start a new one. LOL- Not much patience here Smile with tongue out! Have fun!

signature

Sunday, November 21, 2010

Atc’s, Flowers, Birthdays–crafting bliss!

Hi there!

I have been making things, crocheting things, printing things, and am planning on sewing things too! I haven’t blogged for ages as I’ve been keeping myself busy with all kinds of crafty creations.

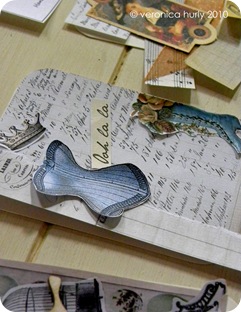
First off, I started making some ATC’s – I joined an online class with Bonnie van Esch to find out more about making them. She had some really cute vintagey printables included in the class too – some of which you can see in my “ATC’s in progress” photos below…

Once I have a few completed, I’ll post some pics on Flickr and will let you know (for anyone wishing to do some swapping).


Then I also joined Bonnie’s awesome new self-paced class called “A Pocket full of Posies” . We’ve made 5 flowers so far – each one different to the other. Bonnie’s videos are super easy to follow and I eagerly await each new post to see what the next flower will be.

NOTE: You can join at any time as the class is totally self-paced. So pop on over and join us! It’s $15. I think there are around 12 classes.

Here’s one of my felt roses I made from her class which I popped on top of a facecloth cupcake: So cute!


Take a look here for instructions for folding the facecloth

I haven’t taken photos of the other flowers yet, but will do so soon.

The rain has also started (at last). Even though we’ve not had huge storms with loads of water yet, but it’s started and we’ve had a good couple of showers. This was our first Summer rain and I caught my son standing simply watching the big drops splashing on the paving outside.

Then, he simply couldn’t stand it any longer and when I looked again he was standing outside getting drenched! LOL!

Then I have some photos to share of my brother’s 40th birthday party. I made some cute cupcake wrappers and flags and food toppers.

They farm with chickens, so my sister-in-law decided to run with a chicken theme for fun. She had bought some paper napkins, so I scanned one and used that as inspiration as well as using the actual image for the cupcake wrappers. Don’t you just love those cute chickens on the cupcakes?


Then it was my dad’s 75th birthday. So I decided to host an elegant dinner party for 10 of his friends last Saturday. It was a surprise party and we managed to keep the secret so well that he didn’t even recognise his friends when he walked in the room! (He was told they were some of my husband’s colleagues from work).

Here are a few photos of the decorations. I made some cupcake labels and flags as well as treat bag toppers. The treat bags were just for fun as my dad absolutely loves liquorice – especially Liquorice Allsorts. I got the idea for the “eat me” treat bags from somewhere on the net. I can’t remember exactly where, so thank you to whoever gave me the idea!

I then made around 10 wine-glass lampshades for the table, continuing with the black and white vintage images. (Most of which came from Karen over at The Graphics Fairy) – click on her button on the right hand column here on my blog.

Although not very masculine, I guess, I added some vintage teacups on the table with roses floating in them nonetheless. The one below is actually very special as it comes from the tea set (which I still have) which my dad “gave” his mom when he was born 75 years ago in November 1935. When I was younger I thought the design was awful – now I love it! I love the unusual art-deco style and especially the black details. It’s very sentimental to me, so I never ever use it for fear of breaking something.

032I often use tea cups as vases on my dinner table settings as they add colour and just the right amount of quirkiness.

Yesterday was Shannon’s year-end singing concert with the studio. She looked so lovely all dressed up that I simply had to take a photo. The dress for the evening for the performers was semi-formal, so she had to borrow a dress from her cousins. (I was not going to buy an evening dress for her that she would wear once for a couple of hours). The only problem I have is she looks so grown up when she dresses up like this! I think I prefer her usual shorts and tees! LOL!

shannon 20112010Well that’s my lo…nnng story for this Sunday evening. Hope you have a lovely week full of loads of craftiness!

signature