Hi there!
I have had internet problems of late- I ran out of bandwidth just before month-end and decided that buying another gig would be wasted as it would not be used by the end of the month – so hence no postings for a while from me!
I also have been running around buying new school clothes for next year as my kids are both changing schools. On top of that it’s been the end of the school year, so it’s been a run-around as well as shopping up a storm for shorts, t-shirts and swimming costumes as we’re off on a seaside holiday (more about that later).
Anyway…. I saw this gorgeous idea over at Skip to my Lou a while back and decided I simply had to make it.
Cookie Mix Gift Jar
Here’s my version of it. I used my own recipe which a friend of mine gave me around two years ago. These biscuits are yummy- very much like shortbread. The big “plus” is that they are so easy to make!
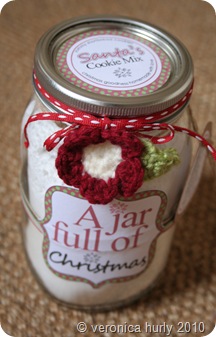
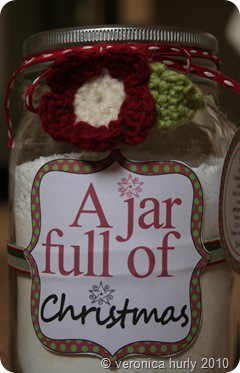
The jar all decorated and filled with the dry ingredients for the cookies:
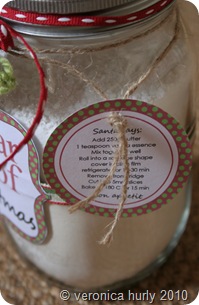
A close-up of the instructions hanging from the jar:
I crocheted flower for decoration:
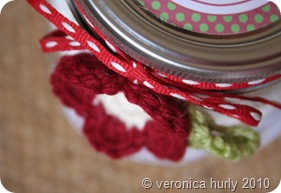
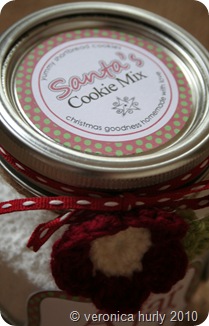
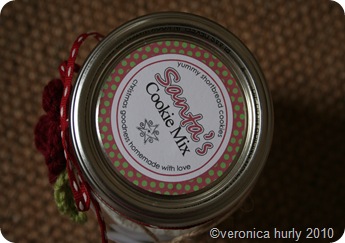
The top of the jar…
You will need :
-
Dry Ingredients (see the recipe below)
-
2 Ribbons for tying around the jar (I used 2 different ones- one for around the ‘tummy’ of the jar, the other for around the lid.
-
A length of jute or string to tie the instructions label onto the jar.
-
hole punch
-
Glue gun (for gluing on the flower embellishment).
-
Modge Podge – for gluing on the labels.
-
Sponge brush applicator for the modge podge.

The Recipe:
Place the following ingredients in a 1 litre jar:
(In South Africa- you can buy a 1 litre Consol jar at pick n Pay)
-
2 cups cake flour
-
1/2 cup corn flour
-
165ml icing sugar
-
1/2 teaspoon salt
Close the lid.
(click on image to enlarge)

* You can also access the printable sheet via my Google Docs account HERE
-
Cut out the labels. I used a 2 1/2 inch round punch (Fiskars) for the round labels.
-
Use the sponge brush applicator to apply a thin layer of modge podge to the “Santa’s Cooki Mix” circle label and apply to the lid of the jar.
-
Measure ribbon for around the ‘tummy’ of the jar. I applied a little modge podge to the ends and adhered it to the jar to keep the ribbon in place before applying the front label. (The ends are hidden under the bracket label).
-
Apply modge podge to the bracket label “A jar full of Christmas” and adhere to the front of the jar over the ribbon.
-
Tie another length of ribbon around the jar lid.
-
Punch a hole in the top of the instructions label and tie it to the jar with jute or string.
-
Add a crochet flower, silk flower or any other embellishment you like using a hot glue gun.
I have halved the original recipe to be able to fit all the ingredients into the 1 litre jar. Here is the original recipe which is for a larger batch of cookies if you want to make some for yourself:
-
4 cups cake flour
-
1 cup corn flour
-
1 1/3 cup icing sugar
-
1 teaspoon salt
-
Mix all dry ingredients together.
-
Add 500g butter and 2 teaspoons vanilla essence
-
combine well.
-
Roll into a sausage shape, cover with cling film. Refrigerate for 15min-1/2 hour.
-
Remove from fridge and slice into 5mm slices. (If too thin, they break easily).
-
Bake at 180°c for 15 minutes
These make great hostess gifts, teacher gifts – or simply a little Christmas gift for friends and neighbours.
I will be away on holiday for the next week. We’re flying to the Seychelles tonight (at 23h55!!) for a week of summer sun, crystal clear turquoise sea and beautiful white beaches. It’s a 5 hour flight so tomorrow morning we arrive in Seychelles at 6am (local time- they are an hour ahead of South Africa). We’ve got our snorkelling gear and sunblock all packed and ready to go, so you won’t be hearing from me for a while.


Linking to :

Chat soon,

![]() I want to be more active on my blog, making it more interesting with lots of free stuff
I want to be more active on my blog, making it more interesting with lots of free stuff ![]() and ideas.
and ideas. ![]() I plan on painting my
I plan on painting my ![]() out for our exhibition this year – we have an awesome theme for this year {more about that another time}.
out for our exhibition this year – we have an awesome theme for this year {more about that another time}. ![]() ; the kids’ playrooms;
; the kids’ playrooms; ![]() Shannon’s bedroom & the formal lounge. I also would love to renovate and refurnish our holiday home in the bushveld
Shannon’s bedroom & the formal lounge. I also would love to renovate and refurnish our holiday home in the bushveld![]() . I’m going to plan our next holiday…
. I’m going to plan our next holiday…![]()
![]()


